Node Writeup w/o Metasploit
Reconnaissance
First thing first, we run a quick initial nmap scan to see which ports are open and which services are running on those ports.
-sC: run default nmap scripts
-sV: detect service version
-O: detect OS
-oA: output all formats and store in file initial
We get back the following result showing that 2 ports are open:
Port 22: running OpenSSH 7.2p2
Port 3000: running Apache Hadoop
Before we start investigating these ports, let’s run more comprehensive nmap scans in the background to make sure we cover all bases.
Let’s run an nmap scan that covers all ports.
No other ports are open.
Similarly, we run an nmap scan with the -sU flag enabled to run a UDP scan.
We get back the following result showing that no other ports are open.
Before we move on to enumeration, let’s make some mental notes about the nmap scan results.
The OpenSSH version that is running on port 22 is not associated with any critical vulnerabilities, so it’s unlikely that we gain initial access through this port, unless we find credentials.
Ports 3000 is running a web server, so we’ll perform our standard enumeration techniques on it.
Enumeration
I always start off with enumerating HTTP first.
Port 3000
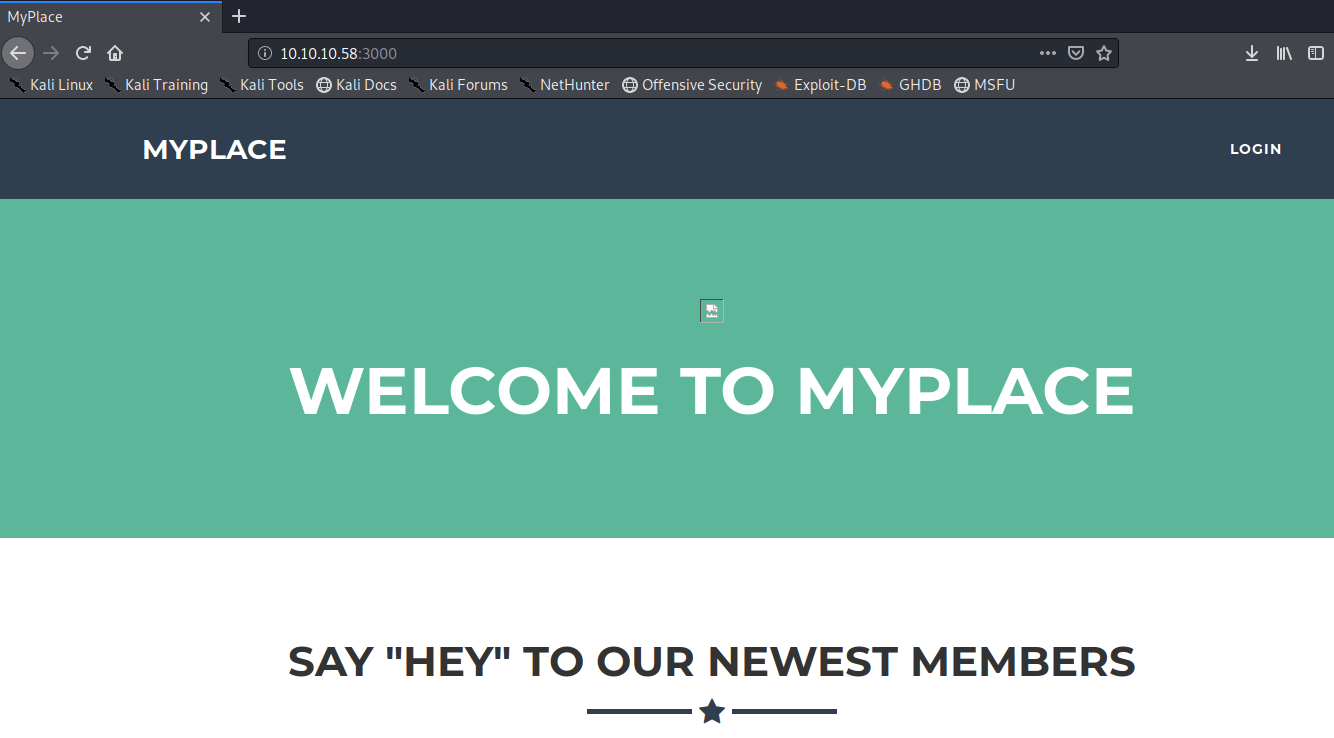
Visit the application in the browser.
View page source to to see if there are any left over comments, extra information, version number, etc.
We find links to a bunch of custom scripts. The app.js & login.js scripts don’t give us anything useful. On the other hand, if you view the /home.js, you get the following code.
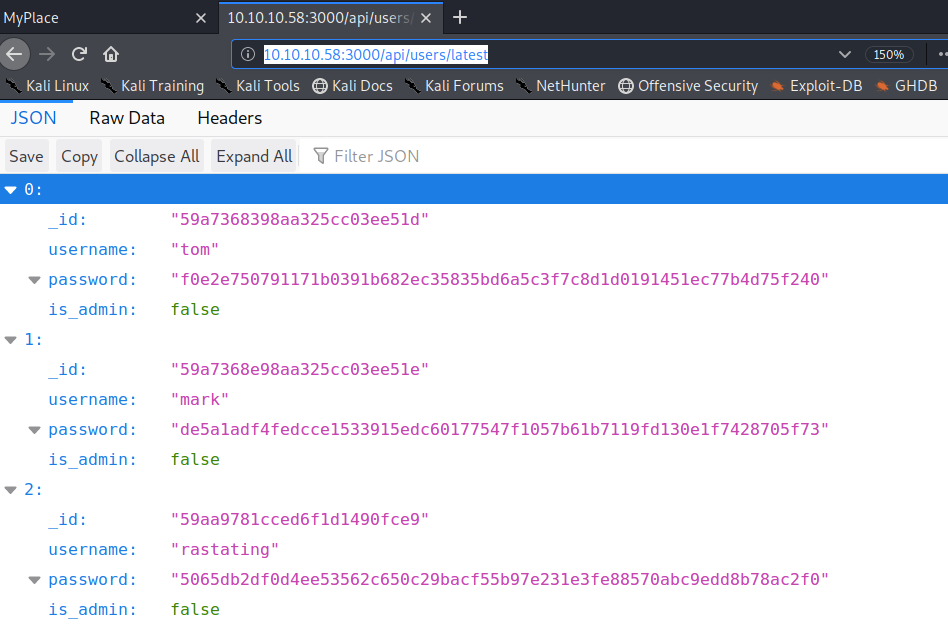
There’s a link to a list of users. Let’s see if that link is restricted.
We get back the above results giving us what seems to be usernames and hashed passwords. As stated with the “is-admin” flag, none of them have admin functionality.
Similarly, the /admin.js script contains the following code.
When you visit the /api/admin/backup link, you get an “authenticated: false” error. This link is restricted but at least we know that the admin account has a backup file in it.
The /profile.js script contains the following code.
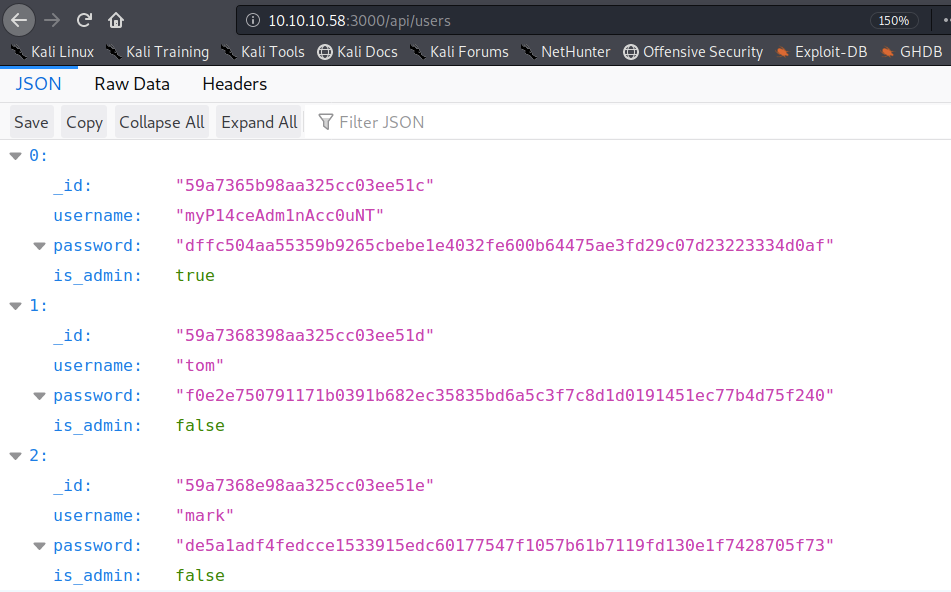
When you visit the /api/users/ link, we get a full list of hashed user credentials, including the admin account!
Copy the credentials and save them in a file.
Use a password cracking tool in order to crack as many passwords as possible. For this blog, I used an online tool since it’s faster than my local machine.
We get back the following result showing that it cracked 3/4 passwords.
One thing to note here is none of the passwords are salted. This can be verified using the following command.
This obviously considerably decreased the amount of time it would have taken the tool to crack all the passwords.
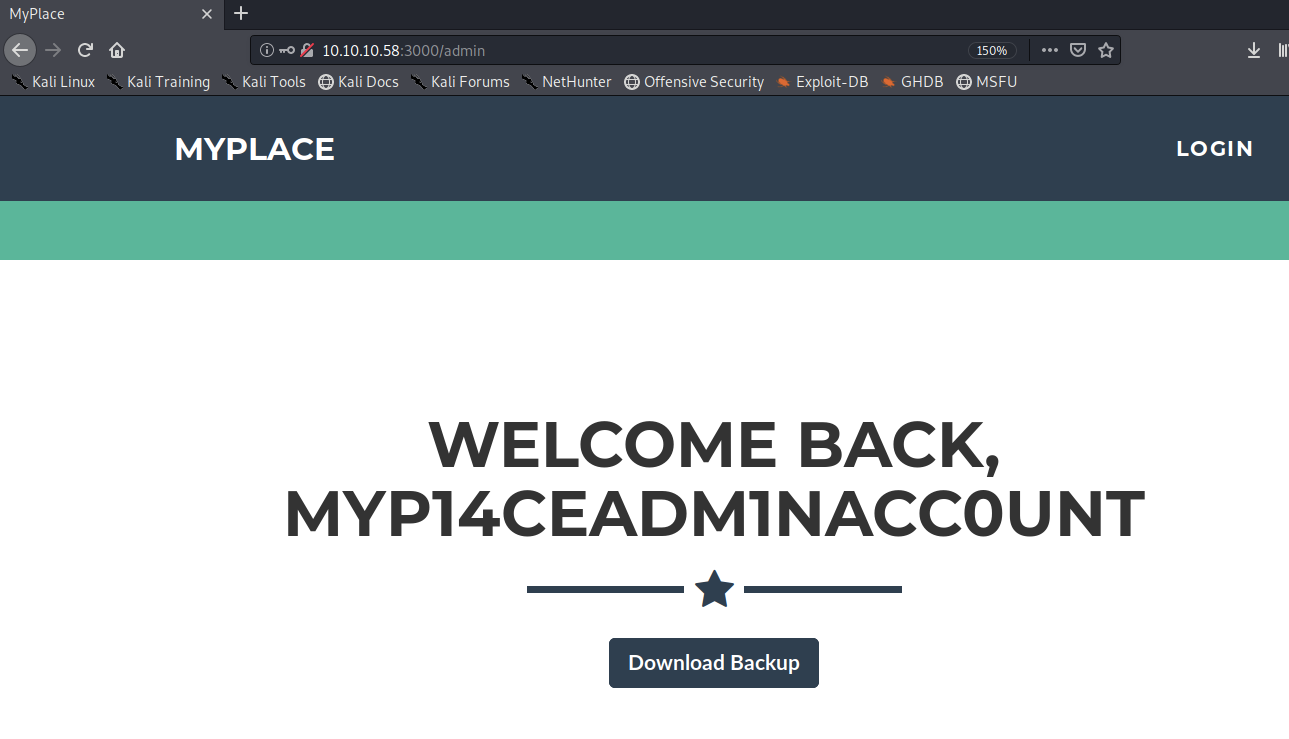
Let’s login with the admin’s account myP14ceAdm1nAcc0uNT/manchester.
Click on the Download Backup button to download the file. Run the following command to determine the file type.
It contains ASCII text. Let’s view the first few characters of the file.
This looks like base64 encoding. Let’s try and decode the file.
Now view the file type.
It’s a zip file! Let’s try and decompress it.
It requires a password. Run a password cracker on the file.
-u: try to decompress the first file by calling unzip with the guessed password
-D: select dictionary mode
-p: password file
It cracks the password!
Unzip the file using the above password.
Now it’s a matter of going through the files to see if there are hard coded credentials, exploitable vulnerabilities, use of vulnerable dependencies, etc.
While reviewing the files, you’ll see hard coded mongodb credentials in the app.js file.
We found a username ‘mark’ and a password ‘5AYRft73VtFpc84k’ to connect to mongodb locally. We also see a backup_key which we’re not sure where it’s used, but we’ll make note of it.
Initial Foothold
Most user’s reuse passwords, so let’s use the password we found to SSH into mark’s account.
It worked! Let’s locate the user.txt flag and view it’s contents.
We need to either escalate our privileges to tom or root in order to view the flag.
Let’s transfer the LinEnum script from our attack machine to the target machine.
In the attack machine, start up a server in the same directory that the script resides in.
In the target machine, move to the /tmp directory where we have write privileges and download the LinEnum script.
Give it execute privileges.
Run the script.
Below are the important snippets of the script output that will allow us to escalate privileges to tom.
The networking section tells us that mongodb is listening locally on port 27017. We can connect to it because we found hardcoded credentials in the app.js file. The services section tells us that there is a process compiling the app.js file that is being run by Tom. Since we are trying to escalate our privileges to Toms’, let’s investigate this file.
We only have permissions to read the file, so we can’t simply include a reverse shell in there. Let’s view the file, maybe we can exploit it in another way.
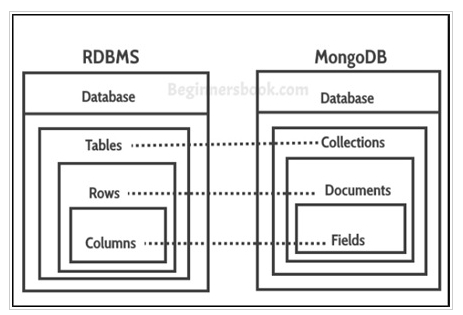
If you’re like me and you’re not too familiar with the mongodb structure, then this diagram might help.
We login using mark’s credentials and access the scheduler database. The set interval function seems to be checking for documents (equivalent to rows) in the tasks collection (equivalent to tables). For each document it executes the cmd field. Since we do have access to the database, we can add a document that contains a reverse shell as the cmd value to escalate privileges.
Let’s connect to the database.
-u: username
-p: password
host:port/db: connection string
Let’s run a few commands to learn more about the database.
The tasks collection does not contain any documents. Let’s add one that sends a reverse shell back to our attack machine.
Set up a listener to receive the reverse shell.
Wait for the scheduled task to run.
We get a shell! Let’s upgrade it to a better shell.
This gives us a partially interactive bash shell. To get a fully interactive shell, background the session (CTRL+ Z) and run the following in your terminal which tells your terminal to pass keyboard shortcuts to the shell.
Once that is done, run the command “fg” to bring netcat back to the foreground.
Grab the user.txt flag.
To grab the root.txt flag, we need to escalate our privileges to root.
Privilege Escalation
First, print the real and effective user and group IDs of the user.
Second, review the LinEnum script for any info/files that are either associated to Tom’s id or groups that he is in.
After sifting through all the output from the script, we notice the following file which has the SUID bit set.
Since the SUID bit is set for this file, it will execute with the level of privilege that matches the user who owns the file. In this case, the file is owned by root, so the file will execute with root privileges. From the previous command that we ran, we know that Tom is in the group 1002 (admin) and therefore can read and execute this file.
We did see this file getting called in the app.js script.
The file takes in three arguments:
The string ‘-q’
A backup key which is passed at the beginning of the script
A directory path
Let’s try running the file with the above arguments.
We get a base64 decoded string. Based on the output of the program, I’m going to go out on a limb and say that it’s backing up the directory path that is passed as an argument.
To verify that, run the command again and save it in file test, then base64 decode that file.
When decompressing the file, we use the same password we cracked earlier.
Alright, let’s pass the root.txt file path as an argument to the backup program.
Note: When I used unzip on the root zip file, I kept getting a “need PK compat. v5.1 (can do v4.6)” message. So I had to transfer the file to my attack machine and use 7z instead.
Let’s output the root.txt file.
We get the troll face.
Something in the backup file is intentionally preventing us from getting the root flag. Let’s run the ltrace program to see what system commands are getting called when we run the backup program.
We get back the following result.
Let’s look up what the functions do.
strstr: returns pointer to first occurrence of str2 in str1
strchr: returns pointer to first occurrence of char in str1
strcmp: returns 0 if str1 is same as str2
As can be seen, the program is filtering the directory path string. If we include any of the strings enclosed in the strchr or strstr function as a directory path, we end up with a troll face. Similarly, if the directory path is a single “/”, we also get a troll face. So we’re allowed to use a backslash as long as it’s included as a string with other characters.
Note: There are several methods we can use apply on the backup program in order to escalate privileges. I initially solved it using method 1 & method 2, however, after I watched ippsec’s video, I found out there were other ways to escalate privileges (methods 3, 4 & 5).
Method 1 — Using Wildcards
The * character is not filtered in the program, therefore we can use it to make a backup of the root directory.
Then use the same method to base64 decode and compress the file to view the flag.
Method 2 — Using the Home Variable
The ~ character is not filtered either, so we can make use of it to make a backup of the root directory.
First, set the $HOME environment variable to be /root.
Then, call the backup program with the ~ character.
Method 3— Using Symlinks
A symbolic link is a file that points to another file. Let’s point the root.txt file to a file called alt-file.txt.
-s: make symbolic links instead of hard links
Then, call the backup program with the link file.
Method 4— Command Injection
The past three methods involved us exploiting the backup file in a way that gives us access to a privileged file. We haven’t really escalated our privileges to root. This method exploits a command injection vulnerability that will give us a shell with root privileges.
Run ltrace again on the program to backup a file that doesn’t exist, in our case, we name that file “bla”
You get the following system call.
It runs the zip command on the file name. Since the input is only partially validated against the list of characters we found above, we can exploit this to get command execution.
One thing to note is that it does send the output to /dev/null and therefore to bypass that we have to pass a random command/string after our bash shell command.
The new line character (\n) is not blacklisted and so we can use it as part of our exploit. In order to execute multiple commands in the system command we usually use the “;” character but that is blacklisted, so we’ll resort to using the new line character “\n”
The way the exploit works is it first runs the zip command on the first “bla” we encounter, then it reaches the new line and runs the command /bin/bash giving us a shell and then sends the output of the second “bla” to /dev/null.
This gives us root access to the machine!
Another way of doing it is using the printf command.
Method 5— Buffer Overflow
I unfortunately still don’t know how to exploit buffer overflow vulnerabilities yet. When I do, I’ll update this blog explaining how to escalate privileges using a buffer overflow exploit. In the mean time, both ippsec and rastating have walkthroughs explaining it.
Lessons Learned
To gain an initial foothold on the box we exploited three vulnerabilities.
Broken access control. The /users API endpoint was exposed and that allowed us to get a list of credentials without having any access rights. Although access control is being done on other endpoints, the developers must have forgotten to restrict access to this endpoint. Proper access control should be applied on all sensitive API endpoints.
Weak login credentials and insecure hashing implementation. We were able to crack the passwords we found in the users file in a matter of seconds. That was due to two reasons: (1) the users had chosen easy passwords that were easily crackable, and (2) the passwords were not salted and therefore they can be easily looked up in a pre-computed table (rainbow tables) to see if the given password hash matches any of the hashes in the table. Therefore, to avoid this, the application developers should enforce strong password policies on users and use a salt when hashing users’ passwords.
Weak encryption credentials. The backup file we found was zipped and encrypted with a weak password. The administrators should have used a sufficiently long password that is not easily crackable.
Hard coded credentials and password reuse. After cracking the password on the zipped file we found an app.js file that contains hard coded credentials. Although the credentials were for mongodb, a service that was not publicly exposed, the user used the same credentials for his SSH account. This final vulnerability chained with the above listed vulnerabilities allowed us to gain initial access to the box. When possible, developers should not embed credentials in files and security awareness should be given to users on password management best practices.
To escalate privileges we exploited two vulnerability.
Security misconfiguration of app.js. The app.js file was being run as a scheduled task by the ‘tom’ user, although the file was executing code from mongodb using a less privileged user’s credentials (mark). This allowed us to escalate our privileges to ‘tom’. To avoid that, mark should have been the owner of the scheduled task.
Insufficient user input validation in backup binary. The user ‘tom’ was configured to be in the admin group and therefore had execute rights on the backup binary. However, this binary file had the suid bit set and was owned by root. Since command line arguments were not properly validated, we were able to exploit a command injection to get root level access on the system. This could have been avoided if user input was properly validated — whitelisting instead of blacklisting, use of safe functions, etc.
Last updated